やわらかしかっけい

なんでもすぐに忘れてしまう自分のために

WordPressの投稿画面(ビジュアルエディタ)をカスタマイズ

ビジュアルエディタ(TinyMCE)の、
太字やら色々なボタンをカスタマイズしたい。

まずは不要なものを消しましょう

functions.php

<?php
//ビジュアルエディタいらないボタンを削除
//一段目
function remove_tinymce_buttons($buttons){
      $remove = array(
      	'blockquote', //引用
      	'strikethrough', //打ち消し線
      	'wp_adv' //ツールバー切り替え(二段目以下を展開)
      );
      return array_diff($buttons, $remove);
}
add_filter('mce_buttons','remove_tinymce_buttons');
//二段目
function remove_tinymce_buttons_2($buttons){
      $remove = array(
	'strikethrough', // 打ち消し
    'hr',            // 横ライン
    'forecolor',     // テキスト色
    'pastetext',     // テキストとしてペースト
    'removeformat',  // 書式設定をクリア
    'charmap',       // 特殊文字
    'outdent',       // インデントを減らす
    'indent',        // インデントを増やす
    'undo',          // 取り消し
    'redo',          // やり直し
    'wp_help',		// キーボードショートカット
    'alignjustify',		//両端揃え
    'underline',		//下線
    'styleselect'		//スタイルセレクタ(※後述)
      );
      return array_diff($buttons, $remove);
}
add_filter('mce_buttons_2','remove_tinymce_buttons_2');
?>

任意の機能を追加

<?php
// ビジュアルエディタ2段目にフォントサイズセレクタ追加
function add_mce_buttons( $buttons ) {
  $add_buttons = array(
  	'fontsizeselect'
  );
  return array_merge( $buttons, $add_buttons );
}
add_filter( 'mce_buttons_2', 'add_mce_buttons' );
?>

フォーマット選択の中身を任意のものに変更

<?php
add_filter( 'tiny_mce_before_init', 'custom_tiny_mce_formats' );
function custom_tiny_mce_formats( $settings ){
  $settings[ 'block_formats' ] = '段落=p;見出し1=h2;見出し2=h3;見出し3=h4;';
  return $settings;
}
?>

なぜか二段目の「Styleselect」がどうしても消えてくれなかったので、力技

<?php
//スタイルセレクタ消去
function wp_custom_admin_css() {
    echo '<style>div#mceu_14,button#mceu_14-open{display:none !important;}</style>';
}
add_action( 'admin_head', 'wp_custom_admin_css', 100);
?>
PHPで作ったフォームにGoogle reCAPTCHAを実装する

メールフォームは たしかこれを使った
www.php-factory.net

reCaptcha

「私はロボットではありません」というやつ
reCAPTCHA: Easy on Humans, Hard on Bots

Googleアカウントにログインした状態で上記にアクセスし、
「reCAPTCHA v2」を選択して登録し、APIキーを取得。

あとは下記サイトに従って、、
liapoc.com

送信ボタンにdisabled属性をつけておくのは、

<div class="g-recaptcha" data-callback="clearcall" data-sitekey="ここにサイトキーをいれる"></div>
<input type="submit" class="submitBtn" name="button" value="送信" disabled>
</form>
 
<script type="text/javascript">
function clearcall(code) {
	if(code !== ""){
	$(':submit[name=button]').removeAttr("disabled");
	}
}
</script>

この部分ですね。recaptchaにdata-callback="clearcall"というのをつけておいて、
jQueryで外してあげると。

disabledのCSSは以下のように

input.submitBtn:disabled{
	background-color: #aaa;
	cursor:not-allowed;
}

追記

php上記サイトのやつだと動かなかったので、以下のやり方で

<?php
function checkReCaptcha(){
    $url = "https://www.google.com/recaptcha/api/siteverify";
    $request = implode("&", [
        "secret=".urlencode("シークレットキー"),
        "response=".urlencode($_POST["g-recaptcha-response"])
    ]);
    $ch = curl_init($url);
    curl_setopt($ch, CURLOPT_POST, true);
    curl_setopt($ch, CURLOPT_POSTFIELDS, $request);
    curl_setopt($ch, CURLOPT_RETURNTRANSFER, true);
    $response = curl_exec($ch);
    curl_close($ch);
    return json_decode($response);
}
$gResponse = checkReCaptcha();
if ( $gResponse->success ) {
	//メール送る
}else{
	//エラー
}
?>

参考
mofg.net

instagramのフィードを表示させたい

JSONデータをPHPでごにょごにょして....

というのを自作するのは骨が折れるので、

プラグインを使うことに。

下準備

↓を参考に、Instagramの開発者ページからアプリケーション登録を行っておく。
teamnaporitan.com

instafeed.js

instafeedjs.com

header部分で、instafeed.min.jsを読み込んでおく。
jQueryは不要、javascriptのみで動く)

※あいにく動画をブラウザ上で再生する機能はついていないので注意。

javascript

var userFeed = new Instafeed({
  get: 'user',
  userId: 000000000000, //ユーザーID
  accessToken: '000000000.xxxxxxxxx.xxxxxxxxxxxxxxxx', //アクセストークン
  target: 'insta-feed', //要素のID
  limit:1,
  resolution: 'standard_resolution',
  template: '<a href="{{link}}" target="_blank"><img src="{{image}}" alt="{{caption}}"></a><span class="likes">{{likes}}</span><span class="comments">{{comments}}</span><p class="caption">{{caption}}</p>'
});
userFeed.run();

ユーザーIDがわかんなくなっちゃったら、
ここですぐに出せる。
smashballoon.com


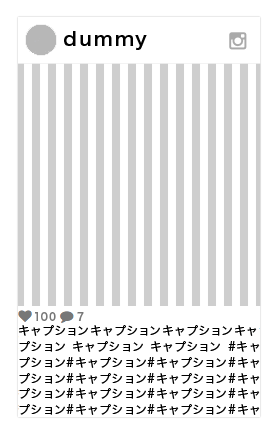
こういう見た目にしたかったので、
f:id:ajicolor:20171121191142p:plain
HTMLとCSSは以下のように整えた。

HTML

<div class="instagram">
<img src="img/insta_icon.jpg" class="insta_icon" alt=""><a class="btn-insta" href="https://www.instagram.com/userid/" target="_blank"><span class="username">username</span></a><i class="fa fa-instagram" aria-hidden="true"></i></a>
<div id="insta-feed">
</div><!--#insta-feed-->
</div><!--.instagram-->

CSS

.instagram{
	box-shadow: 0 0 1px 0 rgba(0,0,0,0.3);
	padding:8px 0;
	position: relative;
	height:400px;
	overflow-y: scroll;	
}
.instagram img.insta_icon{
	width:30px;
	height:30px;
	border-radius:15px;
	margin:0 8px 8px;
}
.instagram span.username{
	display: inline-block;
	padding:4px 0 0;
	font-size:1.2rem;
	color:#333;
	font-weight: 500;
	vertical-align: top;
}
.instagram i.fa-instagram{
	position: absolute;
	top:14px;
	right: 14px;
	font-size:20px;
	color:#aaa;
}
#insta-feed{
	font-family: Arial,sans-serif;
	word-wrap:break-word;
}
#insta-feed img{
	width:100%;
	height:auto;
}
#insta-feed .caption{
	font-size: 0.8rem;
	line-height:1.2;
}
#insta-feed .likes,
#insta-feed .comments{
	display: inline-block;
	color:#777;
	padding:2px 4px 2px 0;
}
#insta-feed .comments::before{
	content:"\f075";
	font-family: FontAwesome;
	padding-right: 3px;
}
#insta-feed .likes::before{
	content:"\f004";
	font-family: FontAwesome;
	padding-right: 3px;
}